How to Replace the Cone Woofer on a Subwoofer
Tools Needed:
- One 3mm Hex (Allen) key
- One small, flat blade screwdriver
- Gently pry back the silicone/rubber trim ring that surrounds the woofer
Please Note: There may be some adhesive that is keeping the ring stuck to the cabinet. It is okay to completely pull the trim ring away from the cabinet, causing the adhesive to break.
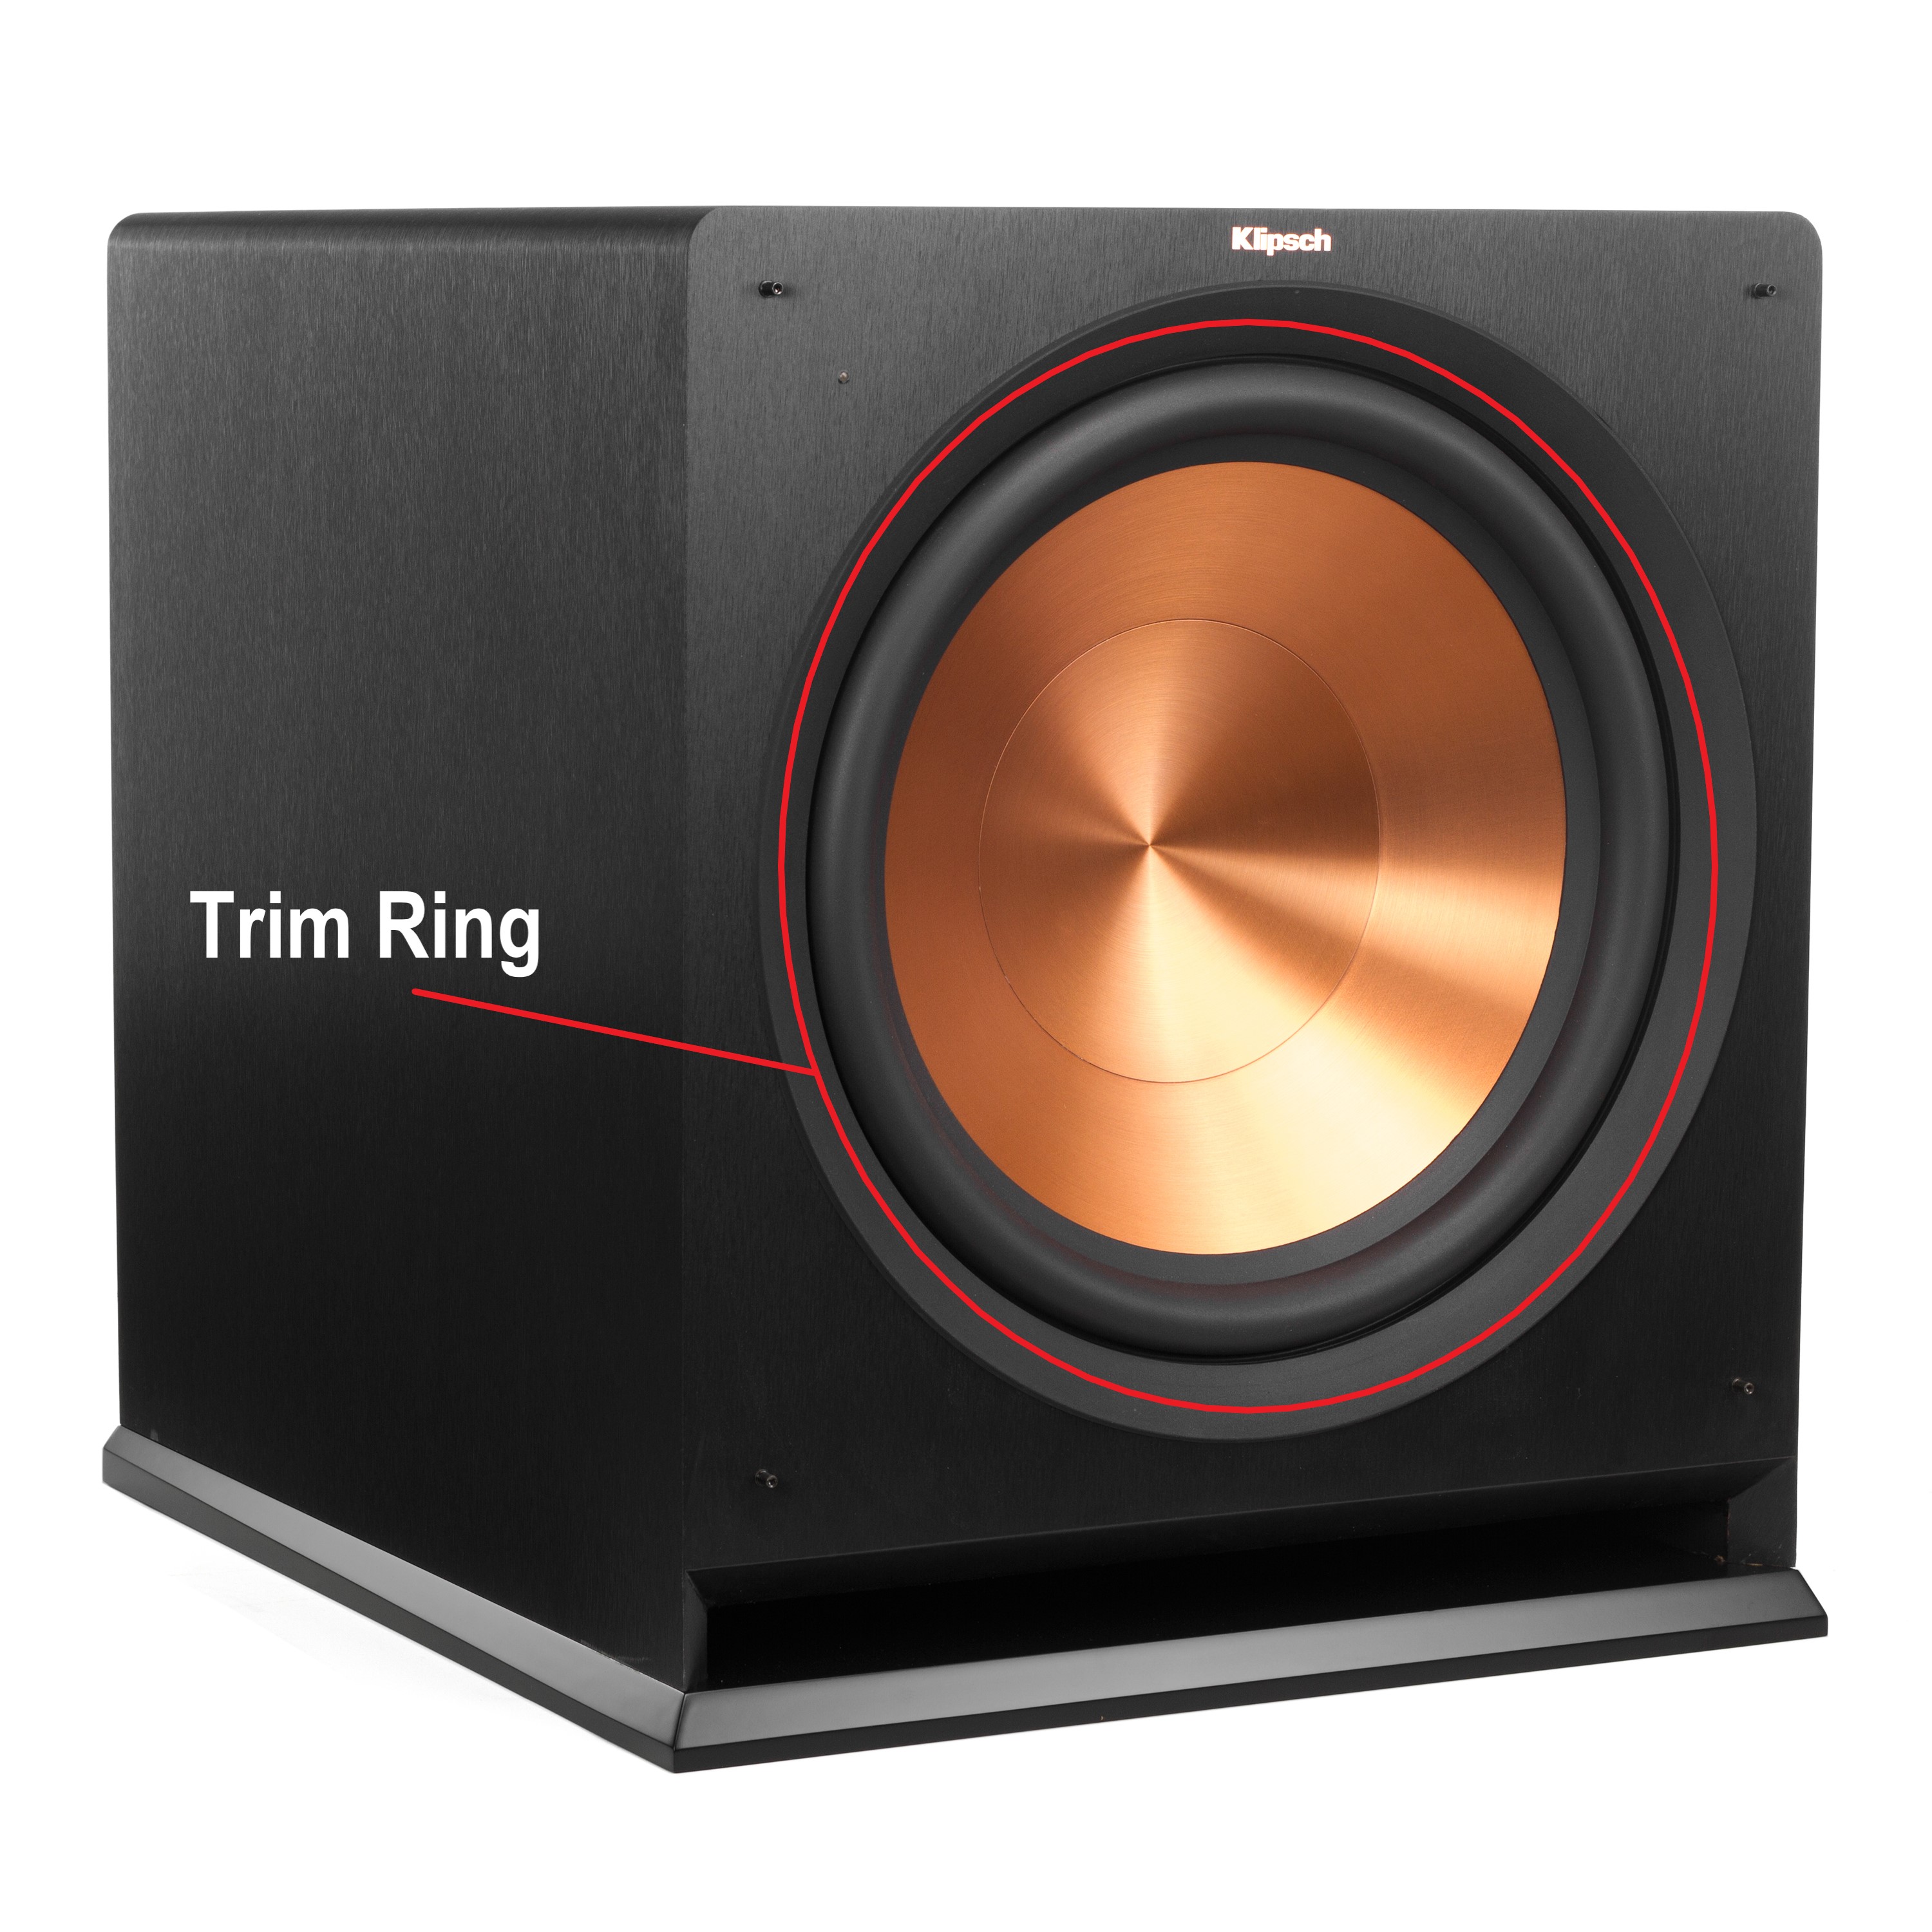
*Picture above is example only; trim ring may vary slightly by model* - Once the trim ring is removed, begin removing the screws from the perimeter of the woofer using a 3mm hex key head
- With the screws removed, the woofer should come free and pull out toward you
- Use a small flat blade screw driver to release the "latch" or "clasp" in the middle of the wire clips holding to the positive and negative terminals of the woofer
- Plug the wires on to the new replacement woofer
- Place the woofer back into position, and replace the screws
- Replace the trim ring by setting into position and gently pressing the trim ring around the edge
- Once complete, the trim ring should sit flush with the front of the speaker (no additional adhesive required)
Comments
0 comments
Please sign in to leave a comment.